I just want to perpetuate this. It feels so great to have your own website. We (can’t say ‘I’, because ChatGPT is my mighty companion) deployed it just now and I am very happy.
It took 2 days from idea to life. Given that 48 hours ago I didn’t even know the word jekyll and now bundle exec jekyll serve makes my heart pump 😄, it is truly something.
So,
My Request was:
Personal website, with:
- Having control over my content
- Ability to add blog posts, projects (and maybe have a sidebar later)
- Free/cheap
- Easy to deploy
- Achievable (it is subjective in this case, so I can’t exactly measure it)
Solution chosen:
GitHub Pages + Jekyll*
- Free (just pay for a domain if you want)
- Customizable – themes, sidebar, projects, and blog all in one
- Tech-friendly but manageable – uses Markdown + some config files
- Achievable - there’s nothing we can’t do with ChatGPT!**
*Jekyll is a static site generator which works directly with GitHub Pages.
**Plus, I think understanding what html/css/js/git are, not being afraid of the command line, and being willing to do a little digging would be enough.
How it works
- GitHub Pages hosts site for free
- Jekyll takes Markdown files (.md), converts them into HTML, and organizes into a structured website (like now - this post is written in .md)
- Website updates automatically when changes are pushed to GitHub repo (otherwise, it remains unchanged - that’s what a static website means)
Steps taken:
STEP 1. Clean GitHub Repository (I already had one for that purpose); Check GitHub Pages are enabled
STEP 2. Install Ruby (usual download + installation) => Install Bundler + Jekyll (via terminal: gem install jekyll bundler)
STEP 3. Create basic Jekyll Site (jekyll new . --force). OR Find template online. I chose Vonge theme[1 - link below, Vonge theme]. It was created for hosting at CloudCannon, but adaptable for GitHub pages as well.
- Download ZIP of the theme
- Add to my repo
- Clean it up (delete unnecessary files like cloudcannon-related, README, etc).
I only know a bit of front-end development, so I was careful with this step and tried to keep the initial structure intact (also in case I need some of the features later I just commented them out).
STEP 4. Update configuration files (.yml, Gemfile)
STEP 5. Test website locally.
Here goes that sweet bundle exec jekyll serve😊
Keep it running for the next steps.
STEP 6. Personalization - hide unnecessary components (like testimonials, newsletter), update images, logo, social links, descriptions.
STEP 7. Create custom 404 Page.
STEP 8. Don’t forget to commit your changes to repo in smaller chunks. I forgot.
STEP 9. Deploy to GitHub Pages. I.e. git push origin main, and
this is where the main “Oh, no!” moment took place.

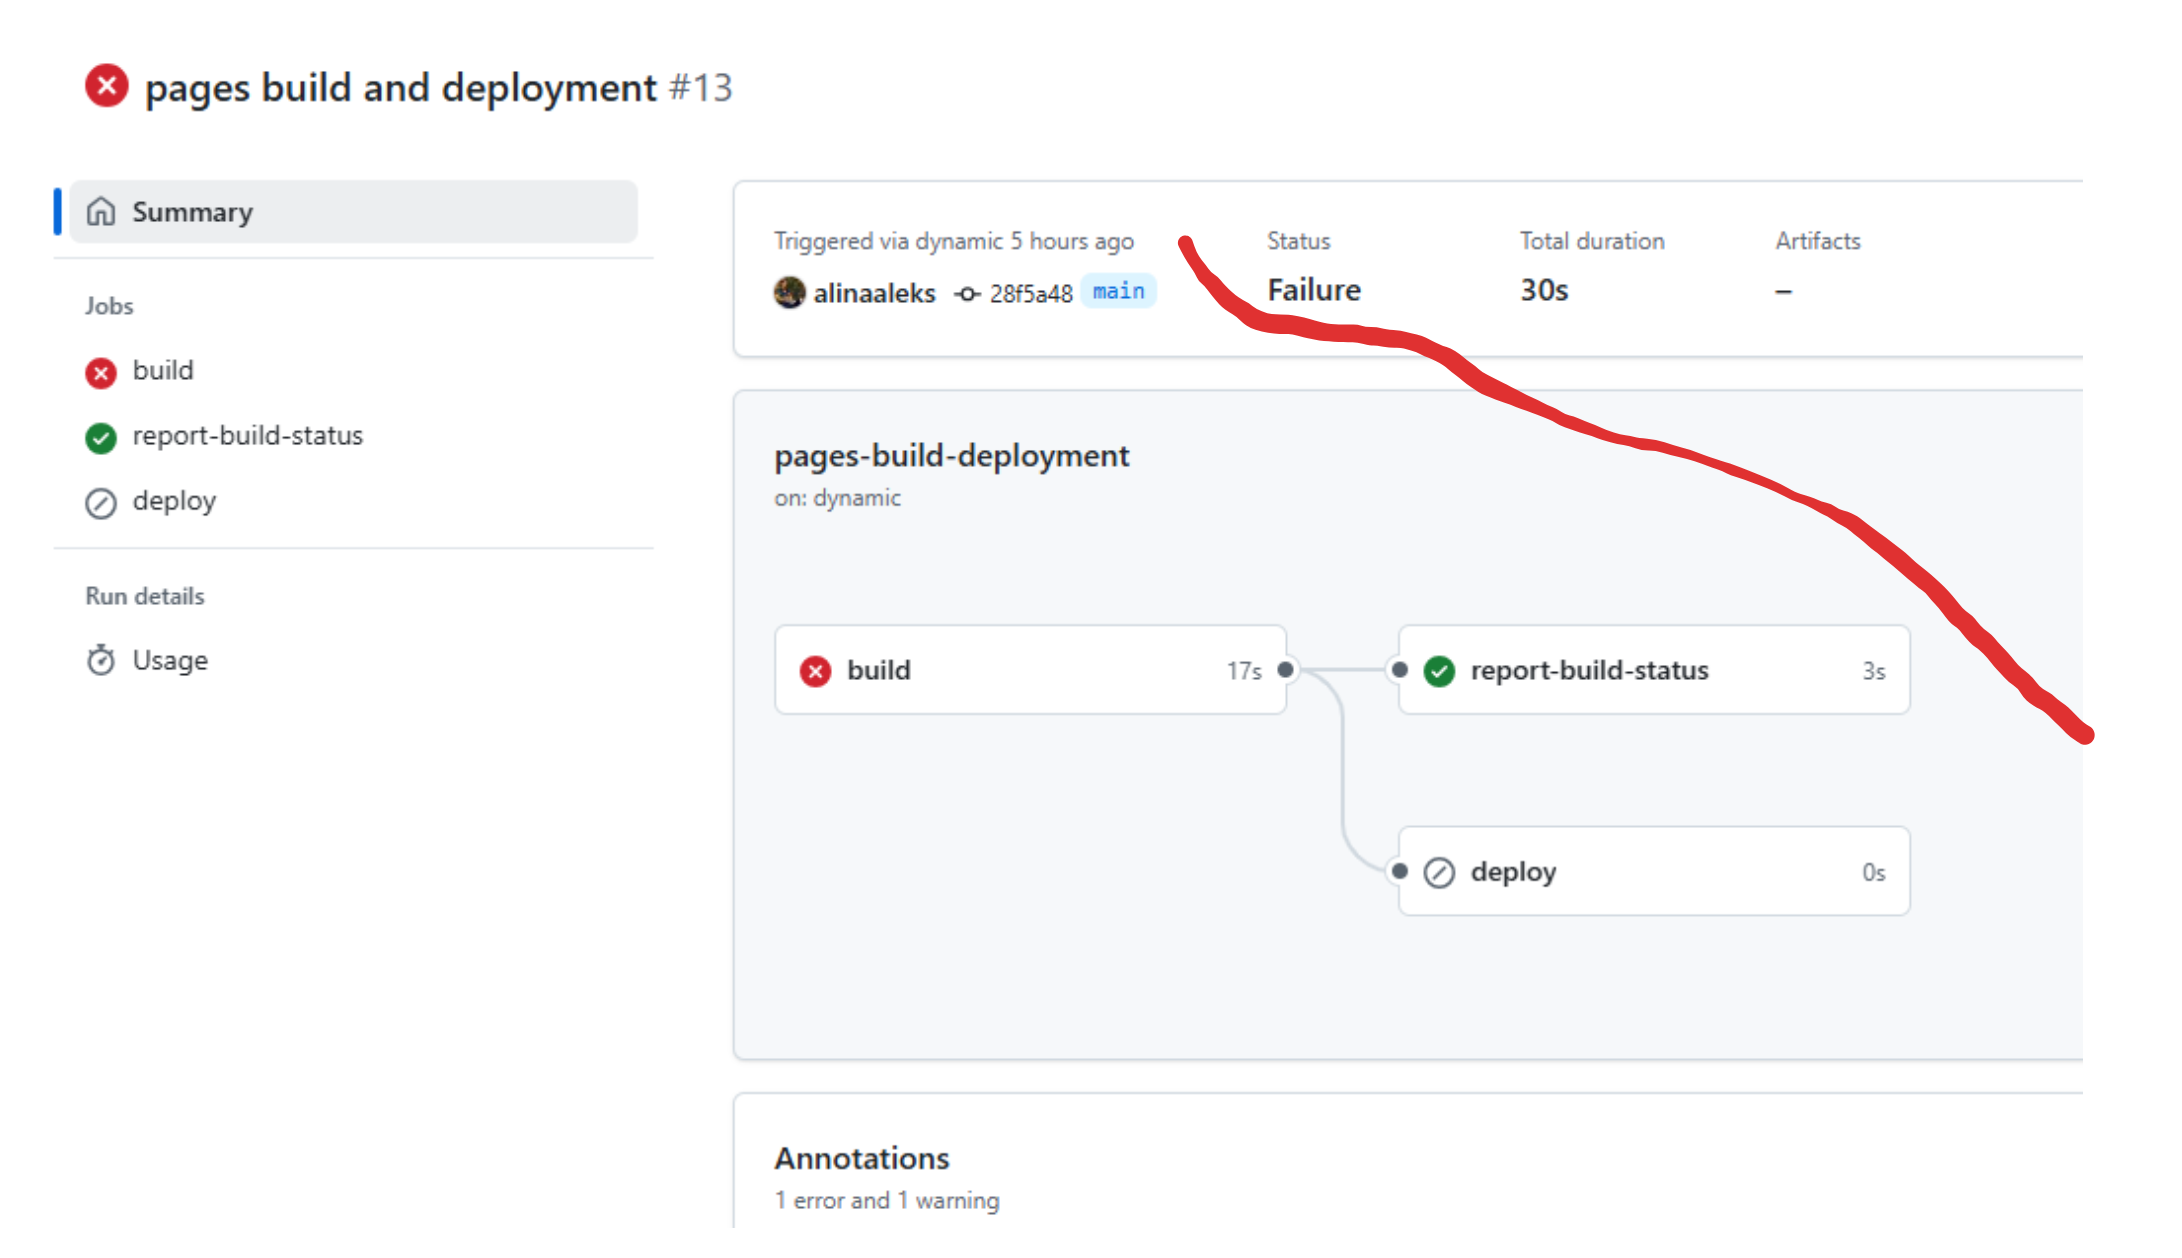
wah-wah-wah-waaah.
And the treacherous “what if it won’t work EVER?!” crept in…
but it was resolved!
What happenned?
It ran perfectly on my local machine, but failed during deployment on GitHub Pages. Gemfile error.
The github-pages gem can't satisfy your Gemfile's dependencies. If you want to use a different Jekyll version or need additional dependencies, consider building Jekyll site with GitHub Actions
Solution:
Change in GitHub repo settings from “Deploy from a branch” (default) to “Deploy from GitHub Actions”. It allows to specify which versions of Jekyll or other gems to use, as well as customize the build process.
Steps:
1. Go to Settings => Pages => Under Source, select GitHub Actions.
2. Follow the prompt to create the jekyll.yml file. => This file will open upon creation.
This YAML file will run your Jekyll build process each time you push changes to your repository, making it much more flexible for handling dependencies and custom configurations.
- "Configure
jekyll.ymlfile (ChatGPT filled it in for me, but if you're interested check out in my repo [2 - link below, my repo]) => Commit changes - Go to Actions => Choose "Deploy Jekyll site to Pages"

Who’s a website-owner now? 😎
STEP 10. Create my happy post.
All in all, it turned out to be easier than I thought. Totally doable.
Some questions along the way:
Do I need to mention my theme name in _config.yml?
If you are using your own theme (like Vonge), you don’t need to specify a theme name in _config.yml. Instead, make sure the theme files are in the right place in your repo, and Jekyll will use them.
What is this bookshop anyway? Bookshop is a component-driven design system for Jekyll and other static site generators. It helps developers manage and reuse UI components more easily.
Why code treated as YAML in my index.html?
Because your index.html file contains front matter, which is YAML.
In Jekyll, front matter refers to the section at the top of each page or post file, where you define metadata like the title, layout, and other variables. This section is enclosed between --- lines and is typically written in YAML format.
Can extensions of files be case-sensitive? Request url contains page-1.**jpg**and my file ispage-1.**JPG**
Yes, it can absolutely be case-sensitive! On GitHub Pages, URLs are case-sensitive, and page-1.jpg and page-1.JPG are considered as two different files.
What can be more satisfying than the moment when code finally works?! There’s truly nothing, darling.

I find cross-links within articles distracting for reading, so I provide references to related links here, in case you're interested:
[1] Vonge Theme - personal blog template for Jekyll on GitHub
[2] jekyll.yml file in my repo on Github